Upgrading Device Firmware via the StarLab PC Application
Field Upgrade of the firmware is a very simple process.
Use Starlab to upgrade the firmware of your device by following the step-by-step instructions below.
Download the latest firmware version for your device:
Vega Firmware Version 2.55(960 kB, BIN) Nova II Firmware Version 2.55(960 kB, BIN) Juno Firmware Version 1.53(216 kB, BIN) Juno+ Firmware Version 2.13(216 kB, BIN) Juno-RS Firmware Version 1.04(216 kB, BIN) Quasar Firmware Version 1.25(53 kB, BIN) IPM-10KW Firmware Version 1.19(216 kB, BIN) IPM-COM-EtherNet/IP-M Firmware Version 2.02(216 kB, BIN) IPM-COM-Profinet Firmware Version 2.02(216 kB, BIN) Ariel Firmware Version 1.40(472 kB, BIN) PE-C Sensors Firmware Version 1.93(108 kB, BIN) BeamTrack Sensors Firmware Version 1.12(88 kB, BIN)
- Make sure you have the latest StarLab software version installed. StarLab contains the required files for upgrading Ophir devices.
After installing StarLab, the firmware upgrade files for the devices can be found in the following local directory on your PC: C:\Program Files\Ophir Optronics\StarLab 3.xx\firmware (xx denotes the specific StarLab version number) - If an even newer firmware upgrade for a device is released before a new StarLab version is made available, that firmware upgrade file (*.BIN) can be downloaded from the top of this page.
If you do download a file for a newer firmware version than that already contained in StarLab, copy it to the StarLab "firmware" folder: C:\Program Files\Ophir Optronics\StarLab 3.xx\firmware. - If the device has an external power supply, make sure that it's connected, and the device is powered before attempting to upgrade.
- Connect the Ophir device, either via a USB cable, Bluetooth pairing, or RS232 serial cable, as appropriate for the device being upgraded. (With the IPM device for example - Connect the serial RS232 cable supplied between the IPM sensor to a serial port on your PC. The same cable also supports upgrading the IPM-COM unit. If your PC doesn't have a serial port, use a USB-to-Serial adapter - not included.
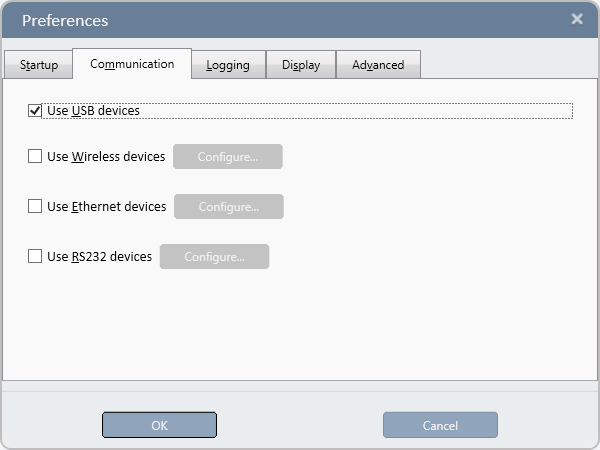
- Start the StarLab application, and via the cogwheel Settings icon, select 'Preferences' then the ‘Communication’ tab, and select the type of communication suitable for the device being used:

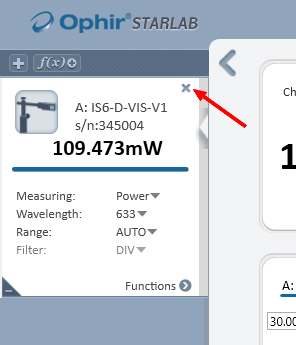
- Make sure the StarLab measurement channel for the device is closed:
- Open the Select Device(s) screen:

- In the Select Device(s) screen press the 'Device Tools' icon on the top bar of the screen:
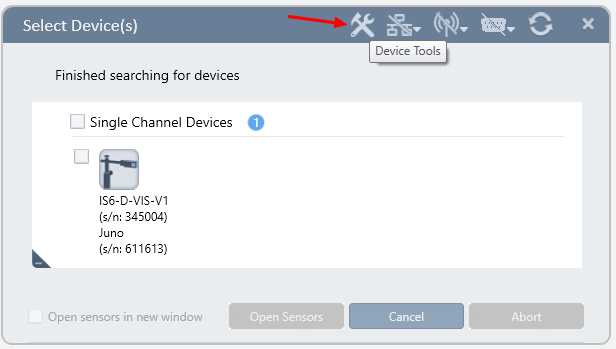
- In the Device Tools screen, make sure your device appears and press the Upgrade button. This opens the Upgrade Device Software screen:

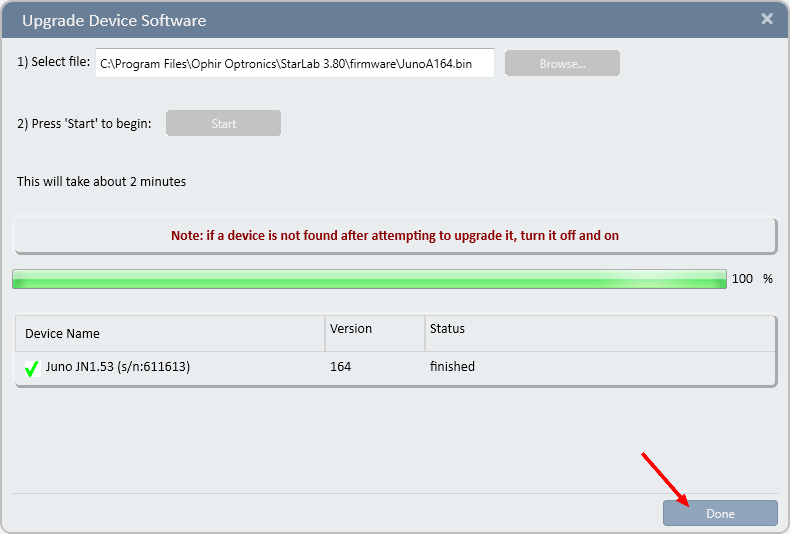
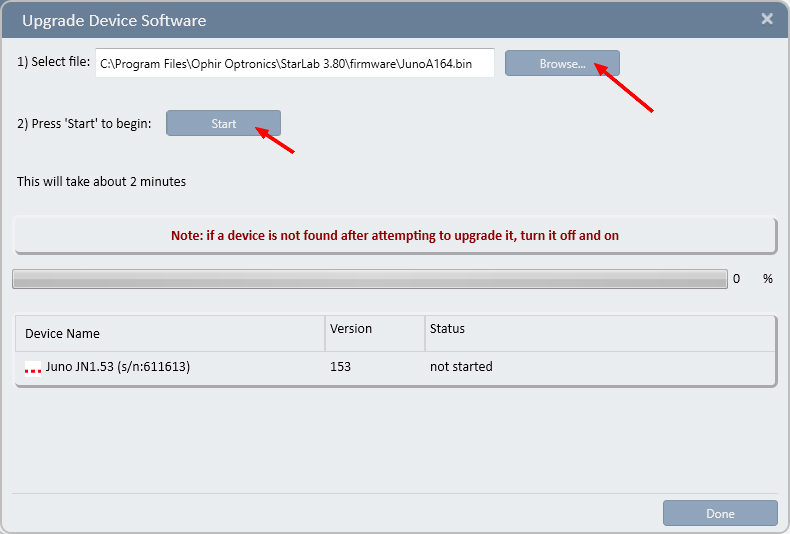
- In the Upgrade Device Software dialogue screen, click the Browse button to locate and select the latest bin firmware file for the device. Then click the Start button to begin the upgrade:
StarLab generates a warning message if the device is loaded with a more recent version of firmware. - The Status of the upgrade is displayed and the upgrade progress (erasing, programming, finished) is shown in the lower portion of the window:

At the end of the firmware upgrade, the progress bar will show 100% and the status will show "finished". Press the "Done" button to complete the process: