RM9-PD sensor | Laser Thermal Power Sensors | Power Sensors - Ophir

RM9-PD Femtowatt Measurement

7Z02953
Description: 

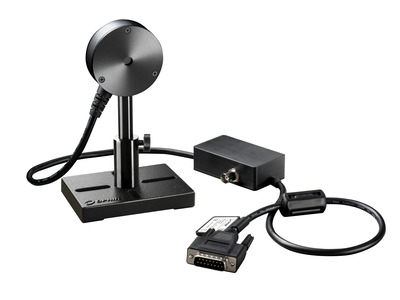
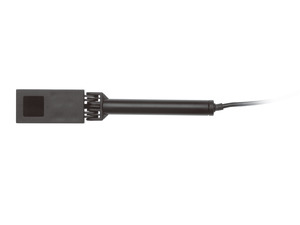
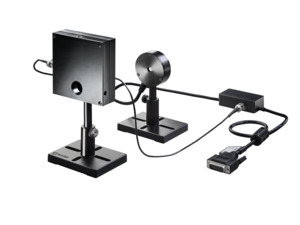
The RM9-PD radiometer is a calibrated sensor for measuring the power of femtowatt CW or quasi CW lasers and light sources. The RM9-PD uses a photodiode sensor in conjunction with an 18Hz chopper (not included, use RMC1 or other chopper). The sensor's power range is from 300fW (femtowatt) to 300nW (nanowatt). It has an 8mm aperture and covers the spectral range from 0.2µm to 1.1µm.

Specification

  • Photodiode w/o Chopper
  • Ø10mm
  • 0.2-1.1µm
  • 300fW-300nW
  • N.A.
  • N.A.
  • Ø62 W x 22 D (mm)
  • N.A.
  • 5W/cm²
  • 3.6 s
  • N.A.
  • N.A.
  • 300nW
  • N.A.
  • CE, UKCA, China RoHS
Need help finding the right sensor? Try our Sensor Finder

FAQ

How should I clean my sensor?

First, clean the absorber surface with a tissue, using Umicore #2 Substrate Cleaner, acetone or methanol. Then dry the surface with another tissue. Please note that a few absorbers (Pyro-BB, 10K-W, 15K-W, 16K-W and 30K-W) cannot be cleaned with this method. Instead, simply blow off the dust with clean air or nitrogen. Don't touch these absorbers. Also, HE sensors (such as the 30(150)A-HE-17) should not be cleaned with acetone.
 
Note: These suggestions are made without guarantee. The cleaning process may result in scratching or staining of the surface in some cases and may also change the calibration.

Was this FAQ helpful to you? yes no
Close

Is the RM9 radiometer compatible with all Ophir power meters and PC interfaces?

It is fully compatible with these meters/interfaces:

  • Vega / Nova II (firmware vs. 2.44 or higher)
  • Juno (1.31 or higher)
  • StarLite (1.26 or higher)
  • StarBright (1.18 or higher)
  • Centauri
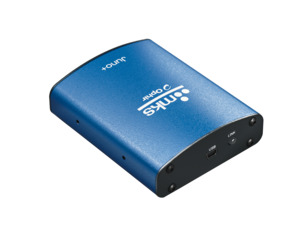
  • Juno+
  • EA-1

It is partially compatible with Ophir’s other meters (Nova, LaserStar, Pulsar, and Quasar). It will function properly with these devices, except with an upper power limit of ~1 mW instead of 100 mW and with reduced accuracy, see specs for more details.

Was this FAQ helpful to you? yes no
Close

How can I maximize measurement accuracy with the RM9 radiometer?

The RM9 is only sensitive to signals chopped at 18 Hz, so placing the chopper as close to the laser source as possible will minimize stray light entering the chopper and being read as part of the signal.
The noise specification is based on a 10 second moving average. Set the power meter to average the measurements for optimal performance.
It is also recommended to zero the sensor before use. This is done by disconnecting the BNC cable between the RM9 sensor and the chopper or turning off the chopper. Then follow the regular instructions for zeroing that can found in your power meter or PC interface manual.

Was this FAQ helpful to you? yes no
Close

Can I measure pulsed laser power with the RM9?

Yes, but keep in mind that the RM9 will measure average power, not energy. Also, pulse rates below ~50 Hz may generate additional noise. Pulse rates close to 18 Hz may cause beat frequency issues.

Was this FAQ helpful to you? yes no
Close

Can I use my own chopper with the RM9?

Yes, but it must be set to a chopping frequency of 18 Hz.
If your chopper has high emissivity (black) surfaces, it should be located as far from the sensor as possible, at least 200 to 300 mm.
If your chopper has low emissivity (bare metal) surfaces, care should be taken to ensure that when it blocks the laser beam it does not generate stray reflections that can reach the sensor

Was this FAQ helpful to you? yes no
Close

Can I use the RM9 sensor to measure an 18 Hz pulsed source without the chopper?

If your source happens to be pulsed at 18 Hz, you cannot use the chopper, since this will generate very low frequency beat signals. However, it might be possible to use the RM9 directly with your laser source, as long as you can connect a BNC sync to the RM9 sensor. Contact us about your particular application to be sure this is the right solution for you.

Was this FAQ helpful to you? yes no
Close

Do I need to recalibrate my instrument? How often must it be recalibrated?

Unless otherwise indicated, Ophir sensors and meters should be recalibrated within 18 months after initial purchase, and then once a year after that.

Was this FAQ helpful to you? yes no
Close

Can a laser measurement depend on the distance from the laser to the sensor?

In theory, if a beam is completely parallel and fits within the aperture of a sensor, then it should make no difference at all what the distance is; it will be the same number of photons (ignoring absorption by the air, which is negligible except in the UV below 250nm). If, nevertheless, you do see such a distance dependence, there could be one of the following effects happening:

  • If you are using a thermal type power sensor, you might actually be measuring heat from the laser itself; when very close to the laser, the thermal sensor might be “feeling” the laser’s own heat. That would not, however, continue to have an effect at more than a few cm distance unless the light source is weak and the heat source is strong.
  • Beam geometry – The beam may not be parallel and may be diverging. Often, the lower intensity wings of the beam have greater divergence rate than the main portion of the beam. These may be missing the sensor's aperture as the distance increases. To check that you'd need to use a profiler, or perhaps a BeamTrack PPS (Power/Position/Size) sensor.
  • If you are measuring pulse energies with a diffuser-based pyroelectric sensor: Some users find that when they start with the sensor right up close to the laser and move it away, the readings drop sharply (typically by some 6%) over the first few cm. This is likely caused by multiple reflections between the diffuser and the laser device, which at the closest distance might be causing an incorrectly high reading. You should back off from the source by at least some 5cm, more if the beam is not too divergent.

Needless to say, it’s also important to be sure to have a steady setup; a sensor held by hand could easily be moved around involuntarily, which could cause partial or complete missing of the sensor’s aperture at increasing distance, particularly for an invisible beam.

Was this FAQ helpful to you? yes no
Close

Why does the chopper have a defined orientation "THIS SIDE TOWARD SENSOR"?

Typical choppers have the same type of surface on both faces: either metallic, low emissivity or black, high emissivity.
When blocking the laser beam, metallic surfaces will reflect or scatter a significant portion of the laser power which may result in stray reflections reaching the sensor.
Black surfaces solve this issue, but if the chopper is positioned close to the RM9 or RM9-THz sensor, they will pick up a thermal signal from the chopper blades.
Stray reflections and thermal signal from the blades can impair measurement accuracy.
Our chopper enjoys the best of both worlds. It has a black surface that should face the laser beam and a low emissivity surface that should face the sensor.

Was this FAQ helpful to you? yes no
Close

Videos

Measuring Laser Power Below the Noise Floor with a Lock-In Amplifier Measuring Laser Power Below the Noise Floor with a Lock-In Amplifier
RM9-PD Radiometer System: Powers Down to Femtowatts! RM9-PD Radiometer System: Powers Down to Femtowatts! RM9-PD Radiometer System: Powers Down to Femtowatts!

The RM9-PD system measures powers all the way down to 300 fW.
This video introduces you to the RM9-PD, and shows you how to use it.

Measuring optical signals in the femtowatt (10-15) to nanowatt (10-9) range can be very challenging.
This video explains how Lock-In Amplifiers can help make these measurements possible.

Tutorials

Tutorials and Articles

White Paper – Working in the Basement: Measuring Signals Below the Noise Floor with a Lock-In Amplifier

Measuring optical signals in the femtowatt (10-15) to nanowatt (10-9) range can be a daunting task. Signal levels this low are lost in typical detector noise levels and swamped by background light. The noise floor for photodiode detectors operated with a small bandwidth (~10 Hz) is on the order of 1 picowatt (10-12). Further narrowing of the bandwidth by filtering or averaging will only provide a small additional reduction in the noise level. Read more...

Ophir Power/Energy Meter Calibration Procedure and Traceability/Error Analysis

This document discusses the interpretation and basis for stated measurement accuracy of Ophir Laser Power/Energy meters.
1. General Discussion
2. Combination of Errors and Total Error
3. Analysis of Power and Energy Calibration Errors
4. Detailed Analysis of Power and Energy Calibration Errors

 Read more...

Laser Measurements in Materials Processing: How and When They Absolutely, Positively Must Be Made

19th century British physicist and engineer William Thomson, 1st Baron Kelvin, was the first to say, “If you can’t measure it, you can’t improve it.” When applying this principle to improving laser-based processes, there are a variety of parameters that must be measured. Given the continuously rising power of laser systems in material processing, the requirements for measurement systems are more challenging than ever. Which technologies are available to measure high-power lasers? How often should they be measured? What measurements should be tracked? When this data is collected, what should be done with it? Read more...

How do I know what range, or scale, to set my power/energy meter to? And what happens if I go over range?

Each given range represents one level of gain of an internal amplifier. The electronics, as always, have a limited Dynamic Range. If the measured signal is too low, in other words near the bottom of the range, then it may be lost in the noise and the reading will be inaccurate and noisy. If it’s too high – there may be saturation issues. To give an instrument a usefully wide dynamic range, multiple scales or ranges are used. Switching from range to range can be automatic (“Autorange”), or manual. Autoranging simply starts automatically at the least sensitive range and works its way down the ranges, sampling the signal as it goes, till it finds a range at which the signal is properly detected. Note, by the way, that only in POWER mode is Autoranging available. If we are working in Single Shot Energy mode, there is no Autoranging – simply because when we are measuring a single pulse, the instrument has no opportunity to work its way down the ranges as in Power mode.

 Read more...

White Paper – Low Frequency Power Mode

AbstractThis document describes the inherent problems involved with measuring average power for low frequency pulsed laser sources, and describes the new “Low Freq. Power Mode” being offered on many Ophir devices and meters to solve these problems. It describes how to use the new mode and mentions some tips for obtaining best results. Read more...

Types of power / Energy Laser Sensors General Introduction

Power and Single Shot Energy Sensors
Ophir provides two types of power sensors: Photodiode sensors and Thermal sensors. Photodiode sensors are used for low powers from picowatts up to hundreds of milliwatts and as high as 3W. Thermal sensors are for use from fractions of a milliwatt up to thousands of watts.
Thermal sensors can also measure single shot energy at pulse rates not exceeding one pulse every ~5s.

Repetitive Pulse Energy Sensors
For higher pulse rates, Ophir has pyroelectric energy sensors able to measure pulse rates up to tens of KHz. These are described in the energy sensor section, section 1.3.

 Read more...

Measuring Average Power of Pulsed Lasers with Photodiodes

BackgroundWhen measuring average power using a photodiode detector such as PD300 or IS6-D-VIS, the maximum power or saturation power is determined by the maximal photocurrent that the photodiode can generate while still maintaining linearity. The saturation power is typically 3mW for a bare silicon photodiode. Adding attenuation in the form of a filter or through the use of an integrating sphere will naturally increase the saturation power of the sensor as a whole. Read more...

Measuring Very Low Power IR Lasers with the RM9 Radiometer System

There are two main technologies commonly used today for measuring laser beam powers:
  • Photodiode-based sensors, used for measuring low powers (from pW up to several hundred mW, typically); these are limited to spectral regions from the UV to the near IR, depending on the specific semiconductor used, and
  • Thermal sensors, used for measuring higher powers; the most sensitive thermal sensors can measure from as low as tens of microwatts, and up to 100 KW and beyond.
What if you need to measure very low power laser beams, say on the order of nanowatts, but with wavelengths in the mid or far IR region? This leaves you in a quandary... Read more...

5 Situations Where Laser Performance Measurement is Necessary

Measuring the performance of a laser has possible for a number of years and is accomplished with a variety of techniques. These electronic laser measurement solutions give the laser user more relevant, time-based data that shows trends in laser performance rather than single data points. While these solutions have provided laser users with the ability to present data in a simple and easy to understand manner, the application of the data still seems to be unclear to many laser users. Read more...

Accessories

Customers that purchase the above items also consider the following items. Ophir-Spiricon meters and sensors include a standard manufacturers warranty for one year. Add a one year Extended Warranty to your meter or sensor, which includes one recalibration.
  • 5m Cable

    5m Molded Cable

    7E01176B

    5m molded cable to connect PPS / Quad electronic box to power meter or interface. Order along with sensor to receive this instead of 0.5m cable from electronic box.