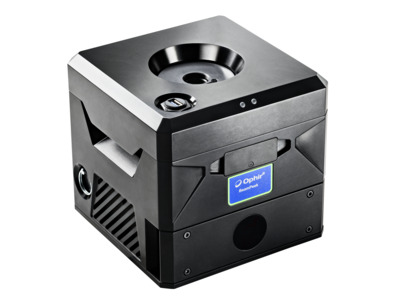
Built to meet the precision demands of modern AM chambers, enabling exact laser measurement across key parameters
The BeamPeek™ system allows real-time beam profiling analysis, including focal spot size and position monitoring, and beam caustic and power measurement of Additive Manufacturing (AM) lasers in Green and NIR range. It tracks how those parameters change with time to assist in the maintenance of quality and repeatability of the manufactured parts. The BeamPeek™ integrates a laser beam profiler camera, power meter, beam dump, beam splitters, and optics to provide an all-inclusive solution for additive manufacturing laser analysis in an industrial environment.
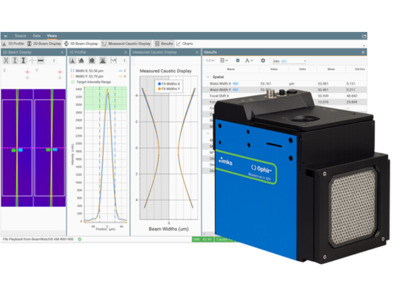
BeamPeek™ software is specifically developed to focus on the needs of Field Technicians in the additive manufacturing industry. It can measure essential parameters for additive manufacturing with minimal user inputs.
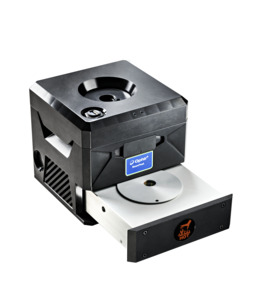
The BeamPeek allows up to 2 minutes of continuous measurement at 1kW with passive cooling, no need for a fan or water/air chilling through the interchangeable beam dump cartridge. Its industrial design makes it easy to integrate into production lines and perform analysis of laser properties without interference with the production process.
- Focal spot size
- Focal spot position calibrated to build plane
- Laser power
- Laser power density
- Changes in spot size & power over time
- M²
- Rayleigh Length
- Divergence
- Waist Location
- Waist Width
- BPP (Beam Parameter Product)
- Ellipticity See All Features
Software
BeamPeek™
BeamPeek™ software is designed to cater to the needs of additive manufacturing field technicians. It provides analysis of critical parameters for ISO Compliant Beam caustic and Power measurement for the Additive Manufacturing industry.
BeamPeek Tools
Software for BeamPeek Temperature Sensors reading, Focal plane and Optical axis position
To download the BeamPeek Start Setup for BeamGage Professional
Specifications
- Product NameBeamPeek
- Spectral Range532 nm, 1030-1080 nm
- Minimum Spot Size34.5 µm
- Power Range10-1000 W
- Focal Length150-800 mm
- Power Meter CalibrationNIST traceable calibration ±3%
- Beam ProfilingISO 11146 Measurements
- CE ComplianceYes
- UKCA ComplianceYes
- China RoHS ComplianceYes
Features
BeamPeek™, High Power Laser Beam Analysis and Power Measurement System for Additive Manufacturing
Frequently Asked Questions
- Where is the Camera sensor/Focal plane positioned?Answer
Unlike the BeamCheck that has the focal plane set so that the camera sensor is in focus when laser focus is positioned at bed surface, the BeamPeek camera sensor is approximate 70mm (the exact value is calibrated individually for each device) over the base/machine bed. To get the beam focus on camera sensor the machine bed must move down the by the calibrated value. The reason for this setup is improved power handling: higher maximum power and longer exposure time to high power.
- IF power is higher value or longer exposure time than maximum allowed will the BeemPeek suffer heavy damage? How would I know if the device is damaged?Answer
The BeamPeek is designed with some spare regarding overload, power or exposure time; if the recommended values were overpassed there are simple visual inspection besides the functional test that customer can perform: removal of Beam Dump tray, checking cleanliness of the protective window (can be removed and cleaned of outgassing due to very high power density or too long exposure), remove and inspect the diffusing interchangeable lens and looking thru the system aperture with lens removed to verify optics integrity in case of too high power.
- What is the minimum waiting time to get power measurements results?Answer
Minimum response time for power measurements is 3 seconds, as for power meters with thermal head.
- Is a periodical calibration required for the BP?Answer
Yes, since the BeamPeek includes Ophir regular Power Meter.
- If NIR laser wavelength 1070nm is used, which PM wavelength should be selected for measurements 1064nm or 1080nm?Answer
Select the wavelength which is closest to laser wavelength, in this case 1064 is closer than 1080.
Accessories
| Compare | Description | Drawings, CAD & Specs | Avail. | Price | ||
|---|---|---|---|---|---|---|
 | SP98005Beam dump cartridge, Descript: Replicable beam dump cartridge for BeamPeek | In Stock | ||||
 | 7E11231USB 3.0 A male to A male cable, 5 meter for BeamPeek |
Resources
Data Sheets
BeamPeek™ Datasheet(1.5 MB, PDF)
Manuals
BeamPeek User Notes(1 MB, PDF)
Catalogs
Laser Beam Profilers Catalog (7.6 MB, PDF)
