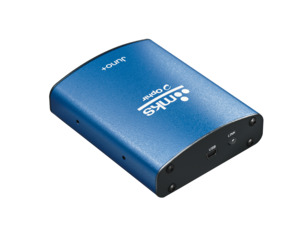
Juno+ USB & Analog Virtual Laser Power & Energy Meter
Juno+ USB & Analog Virtual Laser Power & Energy Meter
Convert your laptop or desktop PC into an Ophir sensor power/energy meter
The basic Juno+ smart compact virtual module turns your PC or laptop into a full-fledged Ophir laser power/energy meter. Just install the software, plug the sensor into the Juno+ module and connect the Juno+ with a standard USB cable to the PC USB port.
Offered with a two-year extended warranty
- Plug and play with all standard Ophir smart sensors
- Autonomous mode: Outputs voltage relative to measurement
- Position & size measurement with BeamTrack
- Record every energy pulse at up to 10kHz
- Log power and energy, average, statistics, histograms with StarLab
- Pulsed Power measurements with Thermopile sensors See All Features
Software
PC Software & Drivers
This section describes various ways to interface the Ophir meter to your PC as well as the software options available. Check out the datasheet for more details.
The StarLab application together with an Ophir meter turns your PC or laptop into a full-fledged laser power/energy meter. Supports most Ophir laser power/energy sensors. Up to 8 sensors can be displayed at once on one PC. By using the Ophir COM Object, you can control the device from your own application. Supports the Ariel, Centauri, StarBright, StarLite, Juno, Juno+, Juno-RS, Nova II, Vega, Pulsar-1/2/4, Quasar, EA-1 and Ariel devices.
Library supplied for a complete measurement interface with most of our USB speaking devices (Centauri, StarBright, StarLite, Juno, Juno+, Nova-II, Pulsar, Vega). Makes use of our new COM object.
Firmware - Juno (latest version 2.13)
Embedded Software for Juno+ Interface
Use StarLab to upgrade the firmware of your device. Follow the step-by-step instructions (see link above).
Specifications
- Product NameJuno+
- Thermal Sensor CompatibilityYes
- Photodiode Sensor CompatibilityYes
- Pyroelectric Sensor CompatibilityYes
- BeamTrack Sensor CompatibilityYes
- StatisticsYes
- Analog OutYes
- Trigger Input/OutputNo
- Power SupplyUSB bus powered
- USBYes
- Data Transfer Rate10,000 Hz
- On-Board Data StorageNo
- Automation InterfaceYes
- Labview VI'sYes
- CE ComplianceYes
- UKCA ComplianceYes
- China RoHS ComplianceYes
Features
Juno+: A New Virtual Laser Power Meter On Your PC
The new Ophir Juno+ enables you to connect your Ophir “Smart Sensor” to your PC via USB. Your PC then becomes a full-featured laser power meter, either running Ophir’s StarLab software application, or perhaps communicating with your own system via our “COM Object”. Get a glimpse of its capabilities in this overview video.
Laser Measurement PC Interfaces
If all your laser measurement work involves a laptop or a PC, rather than a stand-alone meter, one of Ophir's direct-to-PC interfaces could be an ideal solution. These are full-fledged Laser Power and Energy meters, but instead of having a separate on-board display, the PC becomes your display. In this video you will learn about the range of PC Interfaces available from Ophir.
StarLab 3.0: Introduction and First Steps
This video explains the various items on the StarLab screen, and shows you how to perform basic laser measurements. Part 1 of a series of video segments teaching you how to use StarLab.
StarLab 3.0: Second Steps
Sometimes we want to not only get a reading, but perform additional processing on the reading. This video shows you how to use various functions in StarLab, such as Averaging, Scale Factor, Normalize, Density, etc. Part 2 of a series of video segments teaching you how to use StarLab.
Ophir Laser Measurement Virtual Meters
If all your laser measurement work involves a laptop or a PC, one of Ophir's direct-to-PC virtual meters could be an ideal solution. These are full-fledged Laser Power and Energy meters, and - together with the sensor and Ophir’s powerful StarLab software application - turn your PC into a full-function, multi-channel laser measurement workstation.
In this webinar, you will learn about the range of virtual meters and interface options available from Ophir.
Frequently Asked Questions
- What is the maximum number of sensors that can be connected via USB to one PC?Answer
In theory USB supports up to 127 devices.
We recently had 12 sensors connected to StarLab, and it worked normally. The practical limitation is basically how many channels you can realistically see on the display (which would not be a limitation if you will only be logging the data), and of course the number of available USB ports/hubs. - How can I control Ophir USB speaking devices from the PC?Answer
All USB speaking devices (EA-1, Juno, Juno+, Pulsar and USBI as well as the StarBright, Centauri, Vega, Nova-II, and StarLite Power and Energy Meters) can be controlled via our StarLab. This provides full remote control and measurement capabilities. In addition, system integrators can make use of the OphirLMMeasurement COM object for all of our USB speaking devices that are included in the application installation. Documentation and Examples in Visual Basic, LabVIEW are found in the "Automation Examples" sub-directory of your StarLab directory.
- How can I interface my Ophir Power Meter (Juno, Pulsar, NOVA II, Vega) to LabVIEW?Answer
For customers using the new LabVIEW COM Demo, there is nothing additional to do. Just open it and get started. If writing your own LabVIEW application, make sure that the OphirLMMeasurement COM Object is included in your LabVIEW application.
For customers using the legacy OphInstr LabVIEW package, here are additional clarification steps to assist establishing the interface to LabVIEW when connecting an Ophir meter such as the Juno/USBI/Nova II/Vega with the USB.
The sequence for preparing to interface the Ophir Juno (or meters connected through USB) with LabVIEW is generally as follows:
- Disconnect any Juno OPHIR Device from the PC
- Run SwapINF utility
- Set LabVIEW option On
- Press "Swap" button - You will be prompted to "Remove the Ophir Juno Devices before continuing"
- Press "OK" (you have already removed these)
- Press "OK" again (after SwapINF is done)
- Reconnect the Ophir Juno device to the PC that you wish to apply LabVIEW VI's on If asked by Wizard (i.e. in XP) to update software etc.
- Select "not this time" & press "next" button
- Again, press "next" (install software automatically)
From here on you may apply LabVIEW VI's on your device.
- What is the difference between the StarCom and StarLab PC applications?Answer
StarCom is our legacy PC application which connects via RS232 (not USB), for old Ophir instruments having RS232 interface capability (Vega, Nova II, LaserStar and Nova). It performs all basic functions such as real-time data logging, saving data in PC file, off-line data viewing, printing, etc. For a relatively new computer, you'd have to check that it has a serial port to which to connect the meter. The last release of StarCom was in 2008, with all that this implies. StarCom should nevertheless be able to work on a Win7 32 bit PC. More information, including software download, is available at https://www.ophiropt.com/laser-measurement-instruments/laser-power-energy-meters/software/starcom.
StarLab is our full-featured PC application that connects via USB to all Ophir USB-speaking instruments (Centauri, StarBright, StarLite, Vega and Nova II meters, as well as Juno, Juno+, EA-1, Pulsar and the Bluetooth-enabled Quasar PC interfaces). In addition to all basic measurement and data logging functions, it also offers a wide range of special functions (including user-defined mathematical functions), multi-channel operation, COM Object for integration with external systems, etc. More information, and software download, is available at https://www.ophiropt.com/en/laser-measurement-instruments/laser-power-energy-meters/software/starlab.
- Do I need to recalibrate my instrument? How often must it be recalibrated?Answer
Unless otherwise indicated, Ophir sensors and meters should be recalibrated within 18 months after initial purchase, and then once a year after that.
- I see there is newer version of StarLab software available. Why should I upgrade?Answer
Ophir periodically releases new versions of StarLab, adding new features and fixing bugs, so it's a good idea to keep updated with the latest StarLab version.
- Logging data from multiple sensors: How “in synch” are the time stamps?Answer
Sometimes an application requires logging power from multiple power sensors, and being able to compare readings from the different sensors. In such cases, it is necessary to know to what degree the time points of each “channel” are in synch with each other.
Possible solutions would be to use a 2-channel Pulsar, or for example 2 Juno/Juno+.
With Ophir power sensors, the logged data timestamps originate from the PC, with millisecond resolution, for both Pulsar’s and Juno/Juno+.
So basically there is no difference between a Pulsar and a Juno/Juno+ in that respect. They will perform the same.
Each measurement will have its own separate timestamp, and will not have the exact same zero point. However, they will be ‘synced’ to each other to within a millisecond or so. Keep in mind that with power measurements, the instrument’s A/D sampling rate of the power signal is 15 Hz (i.e. every 66.67 msec), so for all practical purposes the 2 channels can be considered in synch with each other.
Accessories
USB MINI-B 2m Cable
Cable USB2.0 A MINI-B 2m (1 unit supplied with the product).
| Compare | Description | Drawings, CAD & Specs | Avail. | Price | ||
|---|---|---|---|---|---|---|
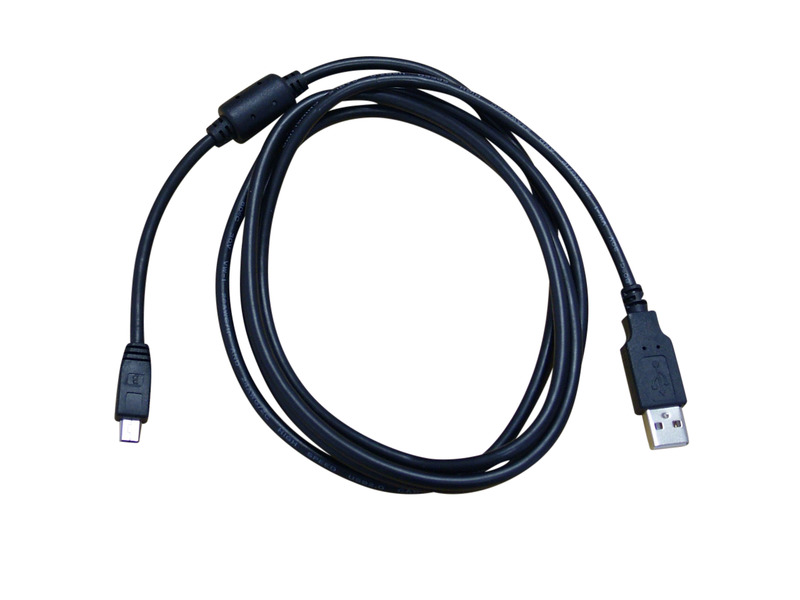 | 7E01217USB Cable 2m, USB-A (2.0) to MINI-B |
General Purpose I/O Connector
Used as analog output plug for Centauri, StarBright, StarLite, Vega, Nova II, Nova, and Juno+.
| Compare | Description | Drawings, CAD & Specs | Avail. | Price | ||
|---|---|---|---|---|---|---|
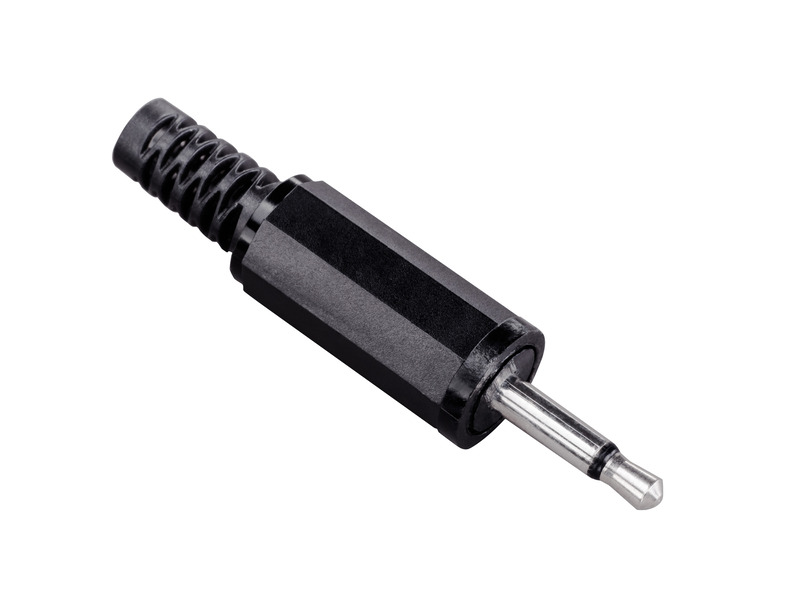 | 7E02008Analog Output Connector, Power and Energy Meters |
Extended Warranty for Sensor
Customers that purchase the above items also consider the following items. Ophir-Spiricon meters and sensors include a standard manufacturers warranty for one year. Add a one year Extended Warranty to your meter or sensor, which includes one recalibration.
| Compare | Description | Drawings, CAD & Specs | Avail. | Price | ||
|---|---|---|---|---|---|---|
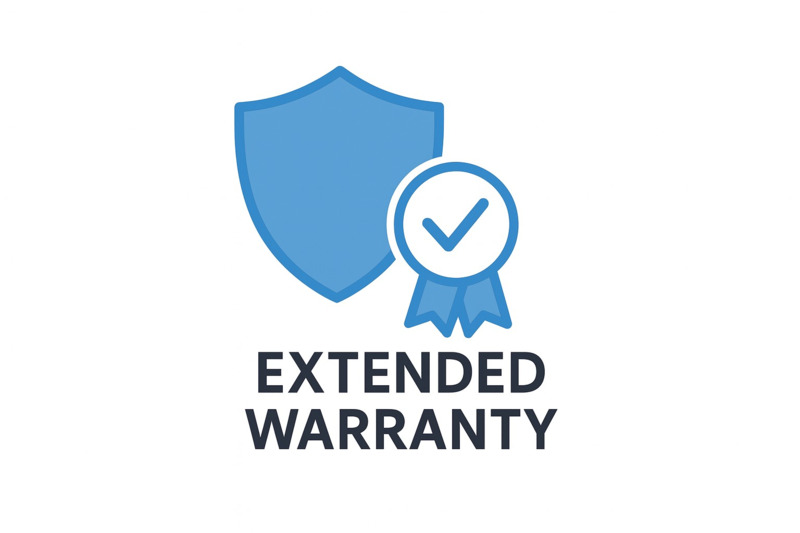 | XWAR-SENSORExtended Warranty for Sensor |
Resources
Data Sheets
Juno+ Datasheet(835.4 kB, PDF)
Drawings & CAD
Juno+ Drawing(302.2 kB, PDF)
Manuals
StarLab User Manual(5.5 MB, PDF)
Technical Notes
StarViewer User Note(711 kB, PDF) 5 Situations Where Laser Performance Measurement is Necessary How do I know what range, or scale, to set my power/energy meter to? When you log energy from multiple sensors in parallel using StarLab Installing LabVIEW support for Ophir Power Meters and PC Interfaces Longer Length Sensor Cables Power Meter System Integration
Catalogs
PC Interface Meter Brochure(562.3 kB, PDF) Power/Energy Meter Catalog(25.5 MB, PDF) Laser Power & Energy Measurement and Laser Beam Analysis Catalog(27.5 MB, PDF) Power Meters Catalog(6.5 MB, PDF)
Technical Articles
Ophir Power/Energy Meter Calibration Procedure and Traceability/Error Analysis Laser Measurements in Materials Processing Low Frequency Power Mode Power and Energy Meters: From Sensors to PC
Software
StarLab.zip(119 MB, ZIP)