
The sort of measurement instruments we are talking about here – which are used in advanced, sophisticated applications – are by necessity themselves advanced and sophisticated, and if I may say so, relatively expensive. After helping so many customers deal with AVOIDABLE problems, we felt it would be an important contribution to offer helpful information so that users of such instruments can get the best performance out of them – and the longest lifetime.
Let’s start with a short review of the basics:
The laser beam is absorbed by a sensor (normally a thermal type), and the resulting heat flow inside the sensor – which is proportional to the incoming beam power – is measured as it makes its way out of the sensor into the environment.
OK, that was our review of the basics. (I did say it would be short.)
Let’s discuss some best practices that can help you maximize your sensor’s performance (and lifetime):
- Preventing laser damage
There are many ways to damage a sensor…
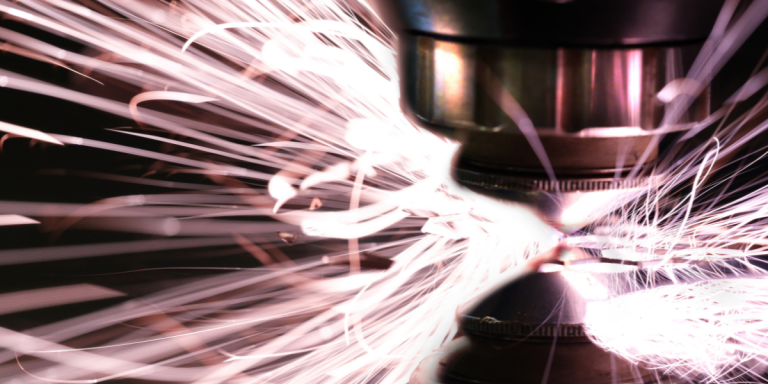
1a. Power density too high
One of the basic parameters specified in a laser sensor’s datasheet is its “Damage Threshold”, meaning the maximum power density (in W/cm2) that the sensor’s absorber can handle without damage. (The maximum energy density – for pulsed beams – is also a type of damage threshold, but we’ll leave that out for now.) A few important points to keep in mind regarding the damage threshold:
- We recommend operating, as far as possible, at not more than 50% of the specified maximum power density. There are various tolerances in the picture, and a reasonable safety margin is definitely a good idea.
- The maximum power density depends on the power, and at high powers it will be a lot lower than at low powers even for the same absorber type.
- Even if the overall average power density of your beam is within limits, if there is a spot within the beam’s cross section inside of which the local power density is too high, that could result in damage.
An important result of point C:
We’ve had cases where users had confirmed that their power density was safely below the maximum and yet there were burn marks on the absorber – off to one side. Here’s an example:
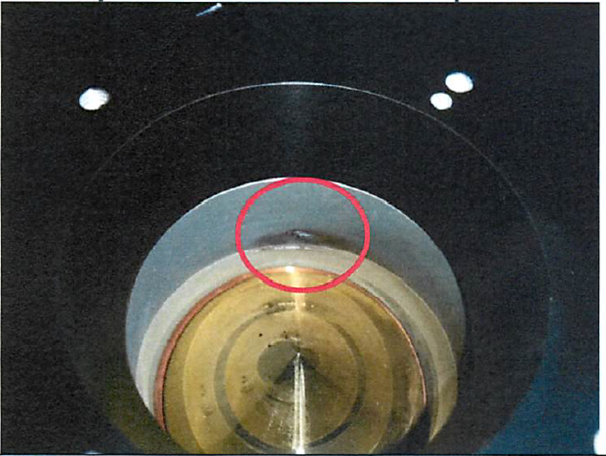
See that gold reflector in the aperture? Many thermal sensor designs use it. Its function is to deflect the beam radially outward, uniformly and with some divergence, so that the absorber – the cylindrical “wall” around the cone – “sees” a larger beam, i.e. one with reduced power density (despite the higher power). If the beam is not properly centered and aligned on the cone, it will not be uniformly spread, and the result will be localized “hot spots” on the absorber. Damage. (The centering requirement is mentioned in the sensor’s datasheet.)
1b. Total power too high
A sensor measuring, say, a 100kW beam, is absorbing a LOT of power. The sensor’s design includes a way of removing that heat (typically by water cooling) at least as quickly as it comes in, since otherwise it would eventually overheat and fail. “Eventually” sounds like a long time; with very high powers, though, that overheating can actually happen very quickly. Imagine you’re about to run some tests; your setup is ready, you turn on your laser, and then you turn on the cooling water circulator. But then…no reading! That half a second of very high laser power with no cooling (but it was just half a second…) could sometimes be enough to zap something in the sensor and kill it. Sometimes the result is a steady zero reading, and sometimes it’s intermittent and unstable. Usually in such cases the first point of failure is a solder connection in the thermal detector element inside the sensor, which gets either disconnected or mechanically weakened by the thermal stress. Either way – expensive disc replacement.
So, in light of all that, let’s talk about…
1c. Tips for prevention:
- Check that your power density is safely below the specified limits, everywhere in your beam
- If using a sensor with a reflective cone, make sure the beam is properly aligned and centered.
- Turn on the cooling water flow before turning on the laser.
- Start with laser power and water flow low and ramp them up gradually. Sudden jumps in either can cause thermal/mechanical stress, increasing the risk of a solder joint disconnect.
I must mention that we have a very detailed article on our website called How to Use Water Cooled Ophir Sensors. Tons of useful information.
2. Keep your sensor clean
Have a look at this thermal sensor’s absorber:
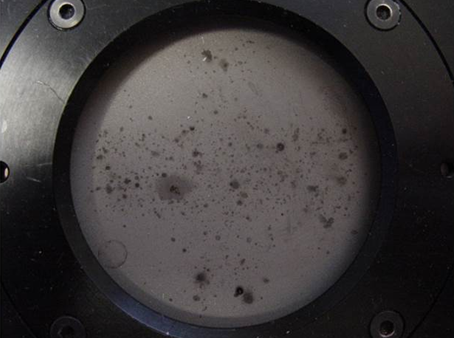
Those black splotches were most likely organic contaminants that splashed onto the absorber, and then got burned on with the next exposure to laser power. It would have been very easy to clean that stuff off, but once it got burned on, too late…That sensor will need an expensive disc replacement. Keep your sensor clean (there are instructions for cleaning various absorber types – check with us). It’s also worth noting that some sensors have protective housing accessories available.
3. Thermal offset
Ophir power meters have an “OFFSET” function, which removes (“zeroes”) any optical and thermal offset currently affecting the sensor (such as some source of background light or heat). If the source of the offset is the sensor itself, though, that is NOT “background”. An example might be if the sensor came into your air-conditioned lab from a hot car; it will start giving off heat as it cools, and that heat flow will of course lead to an offset in the reading. However, if you press that “Offset” button, the meter will continue to subtract the current offset from all subsequent measurements – but that offset will decrease as the sensor approaches thermal equilibrium with the lab, and so the readings will become more and more incorrect.
Bottom line: Use the meter’s “Offset” function only once the sensor is in thermal equilibrium with the environment.
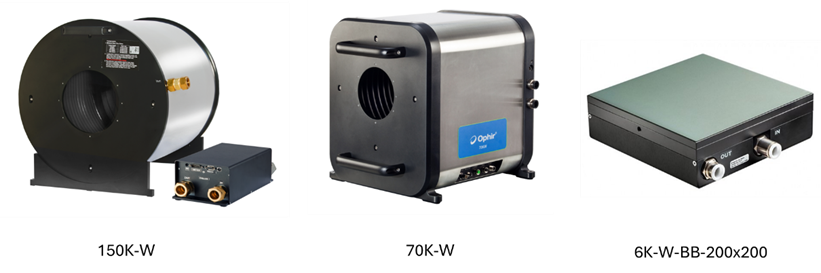
- Calorimetric sensors
Some sensor types measure the temperature increase and the flow rate of the water and derive the power reading from those 2 parameters. Here are some examples of Ophir sensors of this type:
There is a water flow sensor in the water channel. When putting the sensor away, do not use pressurized air to purge the water channels. It could (okay, it WILL) damage the flow sensor.
Spoken, again, from experience…We’ve seen this more than once.
I hope this brief overview has been helpful. By necessity I’ve kept it as short and concise as possible; on our website we have a wealth of information on each of the issues touched on here.