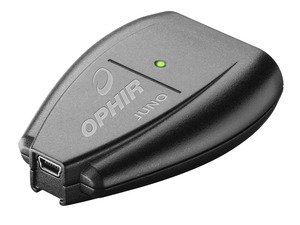
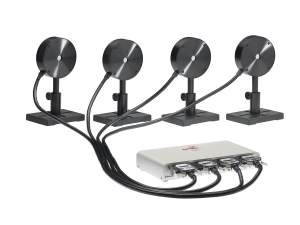
EA-1 Ethernet Adapter

EA-1

7Z01240
Ethernet Adapter
Description: 

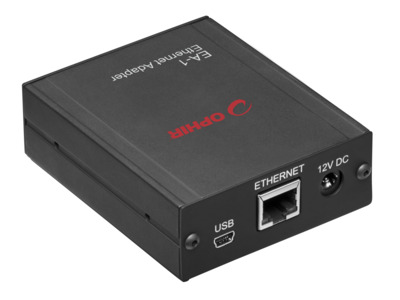
The EA-1 Ethernet Adapter turns your sensor into an Ethernet Laser Power Meter. Features include:

  • From sensor direct to Ethernet with no PC connection
  • Power direct from the Ethernet bus
  • Supports thermopile, photodiode and pyroelectric smart sensors
  • PC application software package included
  • Allows remote monitoring via Telnet, HTTP and UDP protocols
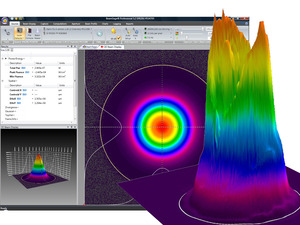
  • Log power and energy, average, statistics, histograms and more with included StarLab application
  • New: Low Frequency Power on Photodiode sensors - power measurement based on pulse cycle (for VCSEL)

Specification

  • Yes
  • Yes
  • Yes
  • Yes
  • Yes
  • No
  • Ethernet, USB
  • No
  • Via Ethernet or included Power Supply
  • Yes
  • N/A
  • N/A
  • Yes
  • N/A
  • No
  • Yes
  • No
  • CE, UKCA, China RoHS
Need help finding the right sensor? Try our Sensor Finder

FAQ

How is the EA-1 Ethernet Adapter powered?

The EA-1 can be powered directly from the Ethernet bus if PoE (Power over Ethernet) is available. If not, it can use a 12 24 VDC standard Ophir power supply.

Was this FAQ helpful to you? yes no
Close

What is included in the box with the EA-1?

Besides the Ethernet Adapter itself, the package also includes:

  • Ethernet cross cable
  • USB-A to USB-Mini-B
  • 12 VDC power supply
  • CD (for PC application, manual, and drivers for using USB virtual COM port)
  • Brackets, screws, and an Allen wrench for mounting
Was this FAQ helpful to you? yes no
Close

How can I control the sensor via the EA-1 device?

There are three ways to connect to the EA-1 adapter:

  1. Telnet:
    Establish a connection using the IP address of the EA-1. The host (e.g., PC) is considered the “client,” while the EA-1 is the “server.”
  2. HTTP:
    The IP address of the EA-1 should be entered into a regular web browser. This will show a top-level “web-page” with several buttons for accessing lower level pages. Commands can also be sent directly with the HTTP protocol. Client and server status are the same as above (Telnet).
  3. USB virtual COM port:
    For configuration and initialization only. This can be used to set the IP address for the first time or switch between dynamic and static IP address modes.

More details can be found in the EA-1 manual.

Was this FAQ helpful to you? yes no
Close

Can I write my own software to work with EA-1 Adapter?

Yes. See chapter 6 of the manual.

Was this FAQ helpful to you? yes no
Close

What sensors does the EA-1 Ethernet Adapter work with?

Thermal, photodiode, and BeamTrack (power/position/size) sensors; pyroelectric and photodiode energy sensors; standard and smart plug (“-SH”) OEM sensors. (Note that the OphirEthernetApp PC Application does not support BeamTrack, but BeamTrack can be controlled by using commands.)

Was this FAQ helpful to you? yes no
Close

How do I set the IP address of the EA-1 Ethernet Adapter?

The device is shipped with these defaults:

IP Address .................................... 10.0.0.2
Subnet Mask ................................. 255.255.255.0
Default Gateway ............................ 10.0.0.1
User Device Name ......................... (blank)
IP Address allocation ...................... static (DHCP disabled)

The IP address can be set via HTTP, Telnet, USB virtual COM port, or the “OphirEthernetApp” software. See Chapter 2 of the manual for step-by-step instructions for each method.

Was this FAQ helpful to you? yes no
Close

Do I need to recalibrate my instrument? How often must it be recalibrated?

Unless otherwise indicated, Ophir sensors and meters should be recalibrated within 18 months after initial purchase, and then once a year after that.

Was this FAQ helpful to you? yes no
Close

What is Ophir Statement of Volatility of Memory for EA1- Ethernet Adapter

See attached

Was this FAQ helpful to you? yes no
Close

I need to embed the EA-1 Adapter into my laser system; can it be controlled from a PLC?

Yes it can. You can find a good set of guidelines in the following article: Tips using the EA-1 with a PLC. Complete instructions can of course be found in the EA-1 User Manual.

Was this FAQ helpful to you? yes no
Close

System Integrators

Besides their use as stand-alone, fully featured laser power/energy meters, Ophir devices are easily incorporated into larger end user applications. This allows system integrators to leverage Ophir's excellence in measurement capabilities with legacy analysis packages.


Ophir provides all the details for integrating the EA-1 device in the EA-1 user manual.


System Integrators will need the following components:

  • Standard mini-B USB cable (P/N 7E01217) for use with the EA-1 device (included).
  • Ethernet Cross Cable (P/N 7E01192) for use with the EA-1 device (included).


Videos

Product Feature: EA-1 Ethernet Adapter Product Feature: EA-1 Ethernet Adapter

Laser measurement over Ethernet…
The EA-1 Ethernet adapter enables you to connect an Ophir “Smart Sensor” to your Ethernet network.
In this video, you’ll get an overview of how you can integrate the EA-1 into your system, and use it to monitor and control your laser sensor remotely.

Tutorials

Tutorials and Articles

Ophir Power/Energy Meter Calibration Procedure and Traceability/Error Analysis

This document discusses the interpretation and basis for stated measurement accuracy of Ophir Laser Power/Energy meters.
1. General Discussion
2. Combination of Errors and Total Error
3. Analysis of Power and Energy Calibration Errors
4. Detailed Analysis of Power and Energy Calibration Errors

 Read more...

Laser Measurements in Materials Processing: How and When They Absolutely, Positively Must Be Made

19th century British physicist and engineer William Thomson, 1st Baron Kelvin, was the first to say, “If you can’t measure it, you can’t improve it.” When applying this principle to improving laser-based processes, there are a variety of parameters that must be measured. Given the continuously rising power of laser systems in material processing, the requirements for measurement systems are more challenging than ever. Which technologies are available to measure high-power lasers? How often should they be measured? What measurements should be tracked? When this data is collected, what should be done with it? Read more...

How do I know what range, or scale, to set my power/energy meter to? And what happens if I go over range?

Each given range represents one level of gain of an internal amplifier. The electronics, as always, have a limited Dynamic Range. If the measured signal is too low, in other words near the bottom of the range, then it may be lost in the noise and the reading will be inaccurate and noisy. If it’s too high – there may be saturation issues. To give an instrument a usefully wide dynamic range, multiple scales or ranges are used. Switching from range to range can be automatic (“Autorange”), or manual. Autoranging simply starts automatically at the least sensitive range and works its way down the ranges, sampling the signal as it goes, till it finds a range at which the signal is properly detected. Note, by the way, that only in POWER mode is Autoranging available. If we are working in Single Shot Energy mode, there is no Autoranging – simply because when we are measuring a single pulse, the instrument has no opportunity to work its way down the ranges as in Power mode.

 Read more...

5 Situations Where Laser Performance Measurement is Necessary

Measuring the performance of a laser has possible for a number of years and is accomplished with a variety of techniques. These electronic laser measurement solutions give the laser user more relevant, time-based data that shows trends in laser performance rather than single data points. While these solutions have provided laser users with the ability to present data in a simple and easy to understand manner, the application of the data still seems to be unclear to many laser users. Read more...

Power and Energy Meters: From Sensors to PC

From the time of its invention, more than 30 years ago, the laser power meter was generally comprised of two parts: a measurement sensor and a display meter. It was always considered better to have such an arrangement with a cable connecting the two because of the hazardous nature of the laser beam. As the display of the results is separated from the measurement sensor, so are the eyes of the operator separated from the laser beam. Read more...

Accessories

Customers that purchase the above items also consider the following items. Ophir-Spiricon meters and sensors include a standard manufacturers warranty for one year. Add a one year Extended Warranty to your meter or sensor, which includes one recalibration.
  • N Polarity Power Supply/Charger

    Power Supply/Charger for Centauri, Vega, Nova II, LaserStar, Nova, EA-1, Pulsar, Quasar, 6K-W, 120K-W and fan cooled sensors (1 unit supplied with these products)

  • USB MINI-B cable

    USB MINI-B cable

    7E01217

    Cable USB2.0 A MINI-B (1 unit supplied with the product)

  • Extended Warranty for Power Meter

    XWAR-METER

    Ophir-Spiricon meters and sensors include a standard manufacturers warranty for one year. Add a one year Extended Warranty to your meter or sensor, which includes one recalibration. More info