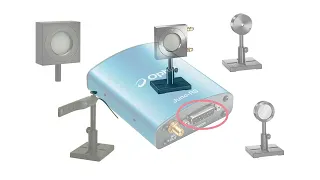
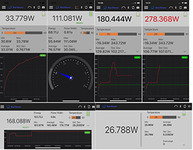
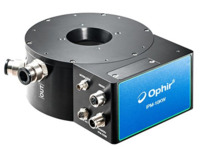
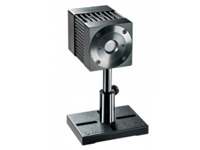
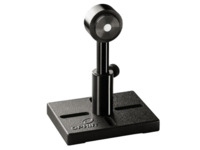
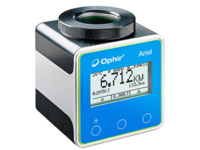
All USB speaking devices (EA-1, Juno, Juno+, Pulsar and USBI as well as the StarBright, Centauri, Vega, Nova-II, and StarLite Power and Energy Meters) can be controlled via our StarLab. This provides full remote control and measurement capabilities. In addition, system integrators can make use of the OphirLMMeasurement COM object for all of our USB speaking devices that are included in the application installation. Documentation and Examples in Visual Basic, LabVIEW are found in the "Automation Examples" sub-directory of your StarLab directory.
Power Meters FAQ's
USB
StarCom is our legacy PC application which connects via RS232 (not USB), for old Ophir instruments having RS232 interface capability (Vega, Nova II, LaserStar and Nova). It performs all basic functions such as real-time data logging, saving data in PC file, off-line data viewing, printing, etc. For a relatively new computer, you'd have to check that it has a serial port to which to connect the meter. The last release of StarCom was in 2008, with all that this implies. StarCom should nevertheless be able to work on a Win7 32 bit PC. More information, including software download, is available at https://www.ophiropt.com/laser-measurement-instruments/laser-power-energy-meters/software/starcom.
StarLab is our full-featured PC application that connects via USB to all Ophir USB-speaking instruments (Centauri, StarBright, StarLite, Vega and Nova II meters, as well as Juno, Juno+, EA-1, Pulsar and the Bluetooth-enabled Quasar PC interfaces). In addition to all basic measurement and data logging functions, it also offers a wide range of special functions (including user-defined mathematical functions), multi-channel operation, COM Object for integration with external systems, etc. More information, and software download, is available at https://www.ophiropt.com/en/laser-measurement-instruments/laser-power-energy-meters/software/starlab.
In theory USB supports up to 127 devices.
We recently had 12 sensors connected to StarLab, and it worked normally. The practical limitation is basically how many channels you can realistically see on the display (which would not be a limitation if you will only be logging the data), and of course the number of available USB ports/hubs.
Whenever we release a new version of StarLab we add support or deal with various other meter-specific issues. This may necessitate upgrading the meter firmware to the latest release. This release is included in the StarLab package and simply enter the Field Upgrade dialog in order to upgrade your meter to be up to date.
The Analog output for Pyro sensor can measure up to 10 Hz. Therefore if you want to measure at a higher frequency (up to the maximum frequency of the sensor), you can connect the Scope Adapter for Pyro sensor (Ophir P/N 1Z11012). This adapter provide a BNC output to scope to see every pulse up to the maximum sensor frequency. Note: The Pulsar device is not equipped with an analog output
This software package is free, and when combined with our USB-capable meters such as Vega or Nova II, or our USB based PC interfaces such as Juno, Pulsar and USBI, it is the ultimate in live data viewing, collection and analysis of laser power and energy measurements.
StarLab is a standalone software package that is very modular. Use it with up to 8 instruments or PC Interfaces to display and collect data from all 8 simultaneously. You can perform math functions like A/B, A-B, A+B, or A*B. Display all on one coordinate system with a different color for each, or split them into several windows. View data in line, bar graph, histogram, or use our simulated analog meter with or without hysteresis. Get live statistics like min, max, average, and std. dev., or select batch size for stats. There's more:
- Measure power and/or energy density , based on user defined beam size.
- Time-synched multi-channel logs to a single log file for later review.
- COM Object for system integrators including in LabVIEW.
If you have one of our instruments with USB or our USB interfaces, download it for free and try it out. If you don't have one of our instruments or USB interfaces contact us, and set up a free demonstration in your lab or production floor. You can download it from this page.
The big difference between StarLab 3.40 and 3.31 is the enhanced support for our new Centauri dual channel meter. (Go download it free now and you'll see what I mean.) There are two other major improvements that I should mention:
- Added Low freq Power (Aka VCSEL) support for: Centauri, StarBright, Juno, Juno + and EA-1
- Added Power from Pulse support for Centauri, StarBright, Juno and Juno +
Find out more (and download StarLab) on the product page.
When installing StarLab, there is usually no need to uninstall or delete Previous StarLab releases, although it might be best in order to avoid confusion between the StarLab versions, and to keep the PC clean and tidy.
If you'd like to uninstall the old version, it's best to do so before installing the new StarLab release. If you uninstall a previous release of StarLab, after installing the new StarLab, you might need to re-register the drivers (and COM object if using it) via "Registration" under the StarLab options menu gear:
Note:
Uninstalling previous releases of StarLab will remove the files and folder names created when the previous StarLab was originally installed, but will leave/preserve other files and folders with other names created by the user (such as log files or COM automation code files) even if left in the previous StarLab folders, as long as the files were saved under a name other than the original demo codes we supplied.
In the main menu, select Options>>Preferences>>logging, and enable the "Open Log Viewer Automatically" check box.
USBI was upgraded to StarLab, which is compatible with Windows 7 (32 and 64-bit). Download the latest version of StarLab here.
Sometimes an application requires logging power from multiple power sensors, and being able to compare readings from the different sensors; in such cases, it is necessary to know to what degree the time points of each “channel” are in synch with each other.
Possible solutions would be to use a 2-channel Pulsar, or for example 2 Juno/Juno+.
With Ophir power sensors, the logged data timestamps originate from the PC, with millisecond resolution, for both Pulsar’s and Juno/Juno+.
So basically there is no difference between a Pulsar and a Juno/Juno+ in that respect. They will perform the same.
Each measurement will have its own separate timestamp, and will not have the exact same zero point; however, they will be ‘synced’ to each other to within a millisecond or so. Keep in mind that with power measurements, the instrument’s A/D sampling rate of the power signal is 15Hz (i.e. every 66.67 msec), so for all practical purposes the 2 channels can be considered in synch with each other.
Ethernet
The EA-1 can be powered directly from the Ethernet bus if PoE (Power over Ethernet) is available. If not, it can use a 12 24 VDC standard Ophir power supply.
Besides the Ethernet Adapter itself, the package also includes:
- Ethernet cross cable
- USB-A to USB-Mini-B
- 12 VDC power supply
- CD (for PC application, manual, and drivers for using USB virtual COM port)
- Brackets, screws, and an Allen wrench for mounting
There are three ways to connect to the EA-1 adapter:
- Telnet:
Establish a connection using the IP address of the EA-1. The host (e.g., PC) is considered the “client,” while the EA-1 is the “server.” - HTTP:
The IP address of the EA-1 should be entered into a regular web browser. This will show a top-level “web-page” with several buttons for accessing lower level pages. Commands can also be sent directly with the HTTP protocol. Client and server status are the same as above (Telnet). - USB virtual COM port:
For configuration and initialization only. This can be used to set the IP address for the first time or switch between dynamic and static IP address modes.
More details can be found in the EA-1 manual.
Yes. See chapter 6 of the manual.
Thermal, photodiode, and BeamTrack (power/position/size) sensors; pyroelectric and photodiode energy sensors; standard and smart plug (“-SH”) OEM sensors. (Note that the OphirEthernetApp PC Application does not support BeamTrack, but BeamTrack can be controlled by using commands.)
The device is shipped with these defaults:
IP Address .................................... | 10.0.0.2 |
Subnet Mask ................................. | 255.255.255.0 |
Default Gateway ............................ | 10.0.0.1 |
User Device Name ......................... | (blank) |
IP Address allocation ...................... | static (DHCP disabled) |
The IP address can be set via HTTP, Telnet, USB virtual COM port, or the “OphirEthernetApp” software. See Chapter 2 of the manual for step-by-step instructions for each method.
Yes it can. You can find a good set of guidelines in the following article: Tips using the EA-1 with a PLC. Complete instructions can of course be found in the EA-1 User Manual.
Bluetooth
The Quasar is no different than the other instruments that have electronic components: it requires annual recalibration. But it’s up to the customer whether to do this or not. We know that the calibration of the instruments degrades somewhat over time, as shown in the datasheet. This may or may not affect your particular application. To maintain compliance with ISO and other standards, we highly encourage annual recalibration.
Unfortunately, this is not possible, at this point. The Quasar can establish a connection with only one host PC at a time. If you connect to the laptop in the clean room, you will not be able to then connect to another PC in an adjacent office; the Quasar will be locked out. You would have to cut the connection on the laptop before you could establish the connection to the second PC. On the other hand, the beauty of the Quasar is that you can ONLY connect to the second PC in the adjacent room, outside the clean room, and log all the data from there. There is no need for a laptop in the clean room, unless of course, if you need to observe data while in there, in which case you would have to do the above.
In actual testing done at customer sites, using the high power option, there was not a place within 100 meters that we could not connect, including going through multiple walls that were made of drywall. The only time we lost transmission was when the walls were made of concrete or we had to pass through some metal doors. With normal labs and offices the signal went right through. In several cases, including a solar power scribing application where windowed doors had to be closed, we were getting a continuous connection as we walked around the spacious building into offices and labs. With the standard range option, the range should be about 1/3 of this i.e. 30 meters.
Quasar runs on Bluetooth, the 2.4-2.5GHz "ISM" band (ISM = Industrial, Scientific and Medical). This is the same band used by WiFi and other technologies. This frequency was chosen as it is available without restrictions around the world. Because other technologies also use it, Bluetooth has to be designed to tolerate interference from other sources. It does this by swapping between 79 channels, at 2.402GHz up to 2.480GHz (each channel is 1MHz). This type of modulation is called FHSS, Frequency Hopping Spread Spectrum. If data does not get through on one channel it retries on a different channel. Other technologies, such as WiFi, use different techniques.
This design makes Bluetooth very robust. In principle, if there is another radio transmitter nearby that is using the same 2.4-2.5GHz band AND using the same modulation scheme, interference is a possibility, but not a real likelihood. If the other transmitter is using a different band, there should not be a problem, because there is very little interference produced at other higher or lower frequencies - this is checked during qualification of these devices for CE and FCC in RF test labs.
In general, Bluetooth is in common use everywhere, by cellular phone headsets, for example, so interference is not normally a significant risk factor.
Yes, we have an Android app that you can download from the Android Market place to run your Quasar on your Android device. Search for Ophir Optronics Quasar. You need to be running Android 2.3.3 or higher.
If using the Bluetooth radio USB adaptor supplied with the Quasar, the adaptor software should be installed first. Once that is complete, and the StarLab software installation is complete, you are ready to connect the Quasar. You may need to change the discovery settings on your PC to allow the Quasar to connect.
To accomplish this, go to the Bluetooth Settings on your PC and ensure you have checked "Allow Bluetooth devices to find this computer".
You absolutely can use the Quasar to do data collection, but how similar the process will be depends on the type of sensor being used. If you are using Ophir Thermopile and Photodiode sensors, these work much the same way on the Quasar as they do on the Nova-II. You should be able to collect data in much the same way as you do today. You just need to establish a Bluetooth connection, open a COM port on the PC, and then can send commands as with the Nova II. You might need a small amount of low level code just to send/receive the commands and strip the prefix/suffix, which is not difficult. Ophir-Spiricon tech support can help.